OEM Profile | Multi-Factor Auth Tab
This tab is used to configure and modify the Multi-Factor Authentication (MFA) settings, as described below (click each to expand the steps):
|
|
Before enabling Ayla's Multi-Factor Authentication for a specific OEM role, make sure that all users with that role have provided their email and/or cell phone number, so that the MFA verification code can be sent to them. |

- In the Choose an option drop-down list, click the application for which you are configuring MFA security, as shown below:
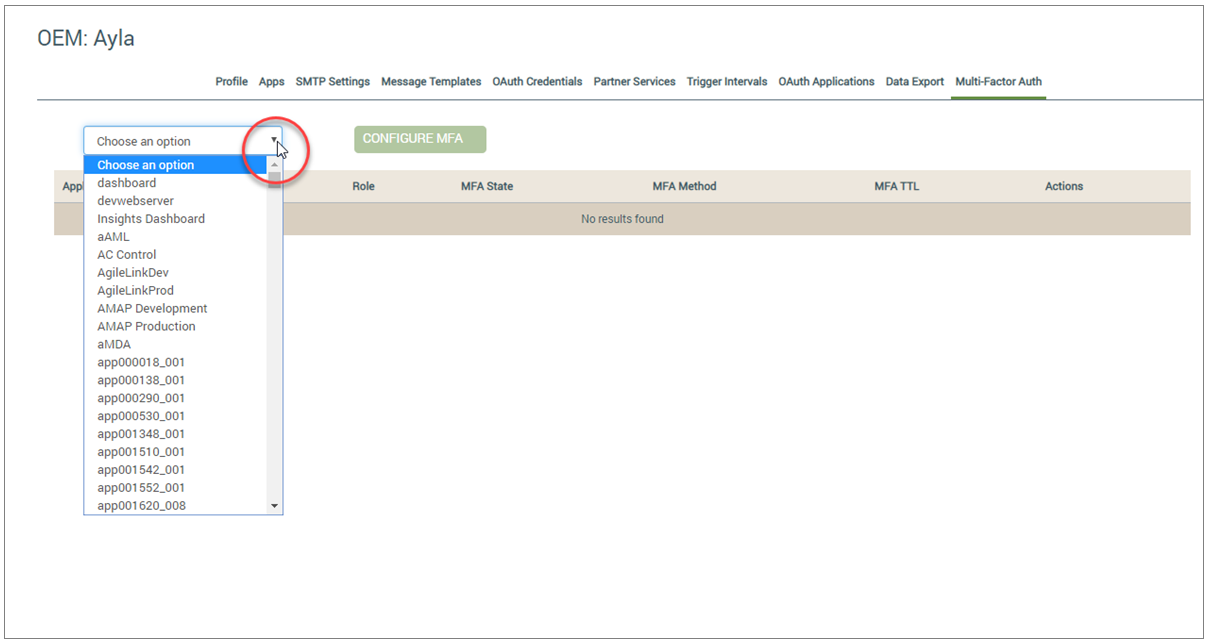
Notice that the drop-down list contains your applications (that have been properly entered in the Ayla Customer Dashboard), and the three main Ayla applications:
- dashboard (Ayla Customer Dashboard)
- devwebsever (Ayla Developer Portal)
- Insights Dashboard (Ayla Insights)
|
|
If you are configuring MFA for your web or mobile application, please ensure that the application log-in mechanism is updated to support this authentication. Click here for API specifications and examples. |
- Click the CONFIGURE MFA button to open the Configure MFA dialog box, shown below:
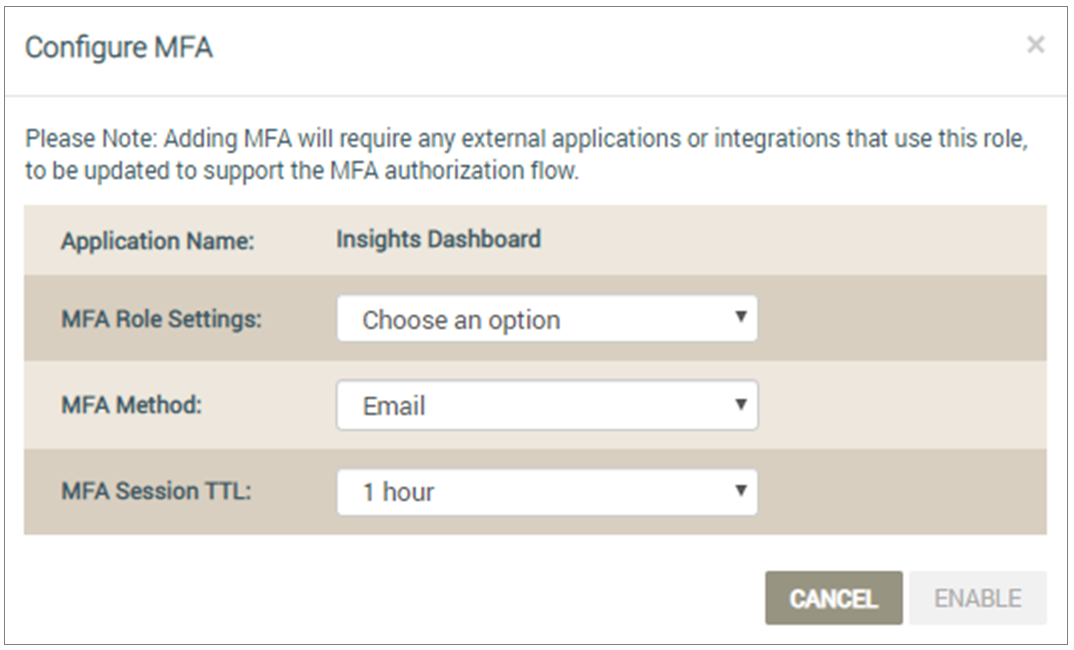
- Configure the MFA settings as follows:
- Notice that the app you chose for this configuration is shown in the Application Name field.
- For MFA Role Settings, select the OEM (or Dealer) role for this MFA configuration.
- For MFA method, select SMSShort Message Service or Email. This is the messaging service that will send the OEM user a verification code to enter when logging in to the app configured for MFA.
- For MFA Session TTLTime to Live, select the time interval that should elapse before the OEM is prompted to enter a new verification code to log in to the app.
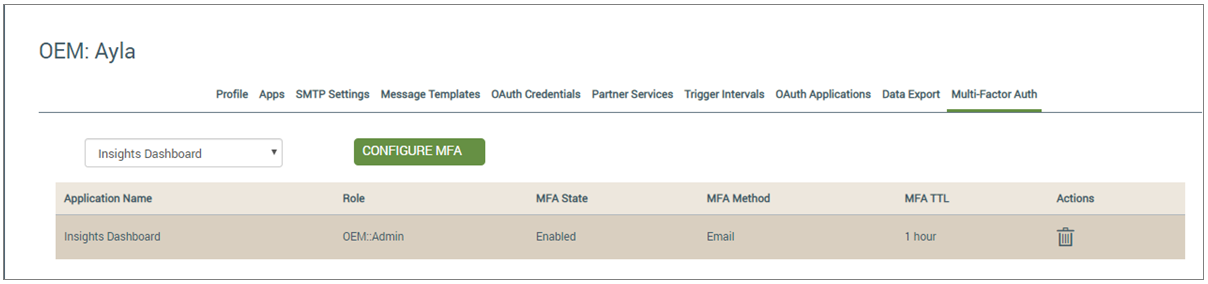
- Click the ENABLE button. This adds the details on this MFA configuration to the Multi-Factor Auth tab, as shown below:
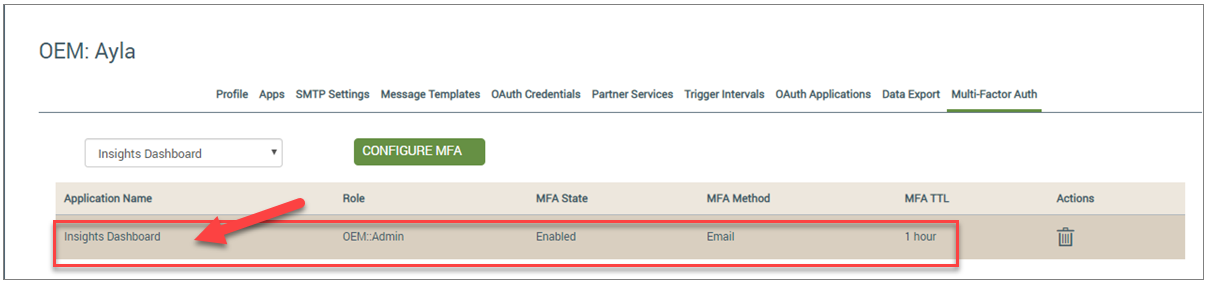
- In the Choose an option drop-down list, select the application for which you plan to edit the MFA settings, as shown below:
- Click the application in the list, as shown below:
This opens the MFA to Role dialog box, as shown in the following example:
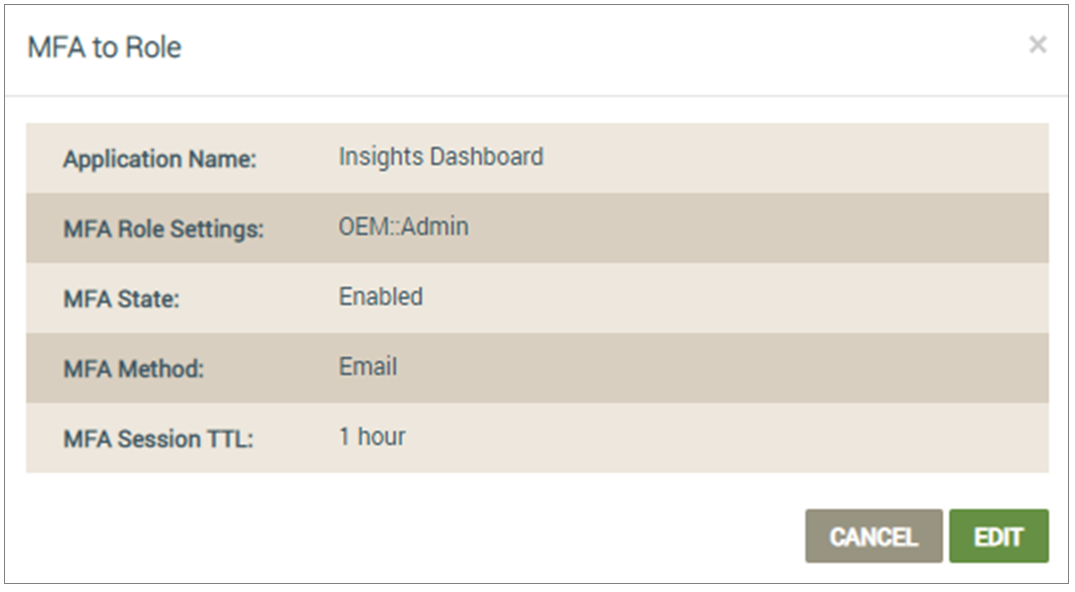
- Click the EDIT button. You can change the messaging service method and the time interval between the required MFA log-in sessions.
- For MFA Method, click the messaging service in the drop-down list.
- For MFA Session TTLTime to Live, select the time interval that should elapse before the OEM is prompted to enter a new verification code to log in to the app.
- Click the UPDATE button. This updates the Multi-Factor Auth tab to show the changes to this MFA configuration. Additionally, a message displays at the top of the page, indicating that the update was successful (example below).

- Click the trash can icon under Actions, as shown below:

This displays the confirmation message for the deletion (see example below).

- Click the ACCEPT button.
How to get here on the dashboard: Click OEM Profile in the Navigation Panel on the left and then the Multi-Factor Auth tab.
Please click here to let us know how we're doing. Thank you.